Atmospheric Effects Network in Houdini
This document outlines a Houdini network that applies an atmospheric fog effect to a scene. The network uses a distance calculation to modulate the fog intensity, a ramp to adjust the effect’s density, and a color mix to blend the original point colors with a specified fog color.
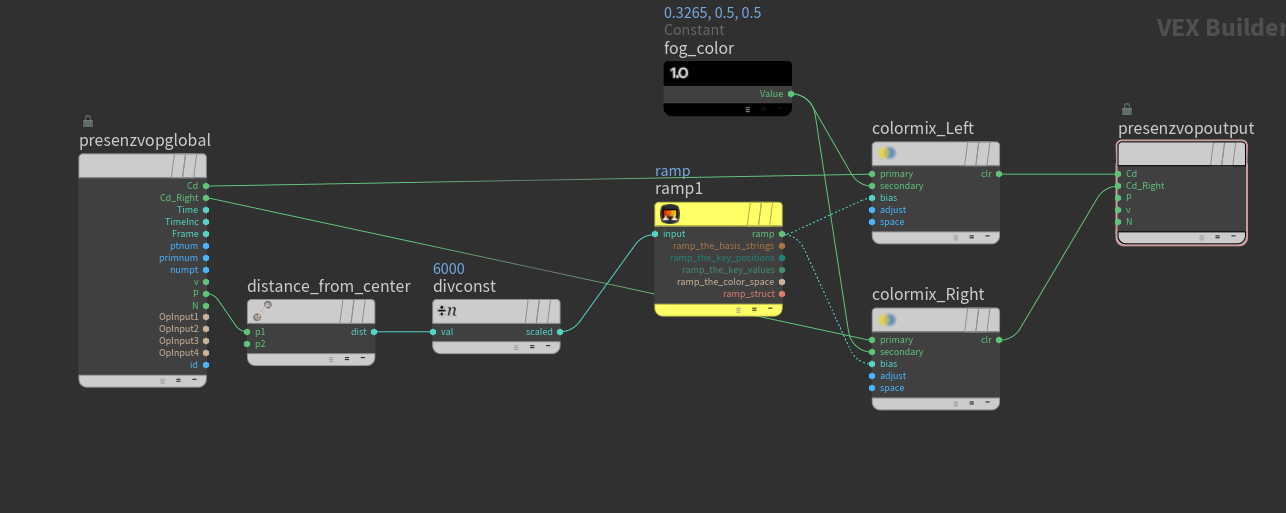
The Atmospheric Effects Network setup in Houdini.
Network Components
presenzvopglobal - This node serves as the starting point of the network, providing the original color data of the points in the scene.
distance_from_center - This custom node calculates the distance of each point from the center (or camera) and scales the value by a constant factor (divconst) which is set to 6000. This factor determines the farthest point distance that will retain its original color.
ramp1 - A black and white ramp node (ramp1) allows for fine-tuning the density and fall-off of the fog effect. The input to this ramp is the scaled distance value from the distance_from_center node.
Constant - A constant node defines the fog_color, an RGB value that represents the color of the fog to be applied to the scene.
colormix_Left and colormix_Right - These nodes perform the blending between the original color of the points (Cd and Cd_Right) and the fog_color based on the output of ramp1. The result is a color that transitions from the original point color to the fog color based on the distance from the center.
presenzvopoutput - The final node receives the mixed color data and outputs the point cloud with the applied atmospheric fog effect for both the left and right components of the stereo image.
Usage and Adjustments
The divconst value can be adjusted to control the range of the fog effect. Increasing the value will allow points further from the center to retain their original color, while decreasing it will cause the fog to affect points closer to the center.
The ramp1 node can be manipulated to refine the fog density and distribution across the distance. A steeper ramp gradient results in a more sudden transition from clear to foggy, while a smoother gradient provides a more gradual effect.
The fog_color can be changed to match the desired atmospheric conditions of the scene. Lighter colors can simulate haze or light fog, while darker colors can represent heavier, more opaque fog.
Note
It is important to ensure that the color spaces of the original point colors and the fog color are consistent to achieve the desired visual result.