Rendering
Output Render Path
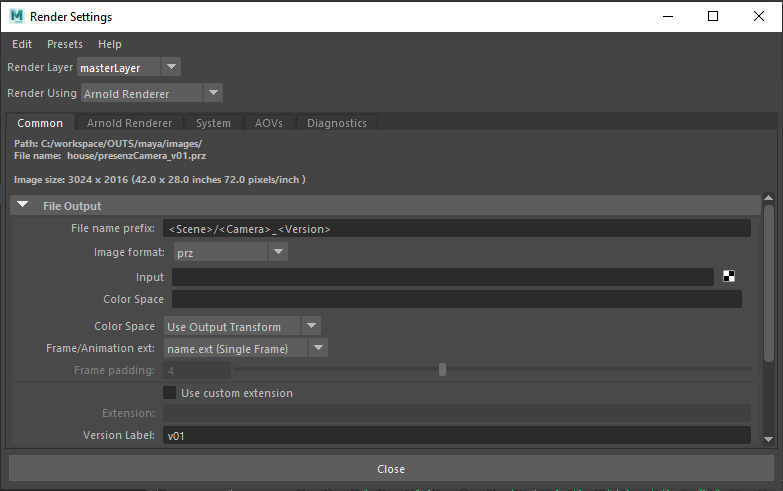
Before rendering, you should specify the path to where you want to save the .PRZ image. In the Maya Render Settings menu go to the Common tab and enter a File Name Prefix and select “prz” as the Image Format. The usual maya keywords are supported.
V-Nova PresenZ will also create a przDetect and przRender folder at that location. These folders are used to store intermediate files generated by the PresenZ two phases system.
Note
Alternatively you can also set a full path to your file : “C:\path\to\renders\yourFileName”.
Detecting, Rendering and merging
To render your PRZ image, select the PresenZ render button.
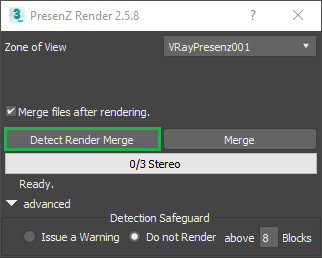
Zone of View: allows you to select which Zone of View you are going to render (Since you can have several in your 3D Scene).
Merge files after rendering: On by default. This will automatically start the merger after completing the different phases of the rendering process. Alternatively, you can manually merge your output files through the command line. This is explained in the PresenZ Utility Merger section.
Render button: This button will automatically launch the different PresenZ render phases, one after the other according your zov settings. It’s name will also change according to your settings. “Detect Render Merger” for instance.
Merge button: This button allows you to manually re-merge your .przRender files after they have been rendered.
Progress bar: Depending on the options the whole PresenZ render will take several phases and possibly blocks. This will show you the progress in those phases.
Detection Safeguard: This is on by defalut and set to 8 blocks. 8 blocks should be plenty to handle very complex scenes properly set. If the detection phase issues more than 8 blocks, usually it means your scene complex geometry not tagged as Chaotic. Visit this section to reduce your number of blocks.
Note
Underneath the progress bar a number will indicate how many passes will be executed for your render, this number can change. For a normal render this number will be 3: a detection pass, a render pass, and the merge.
Animation and Motion Vectors
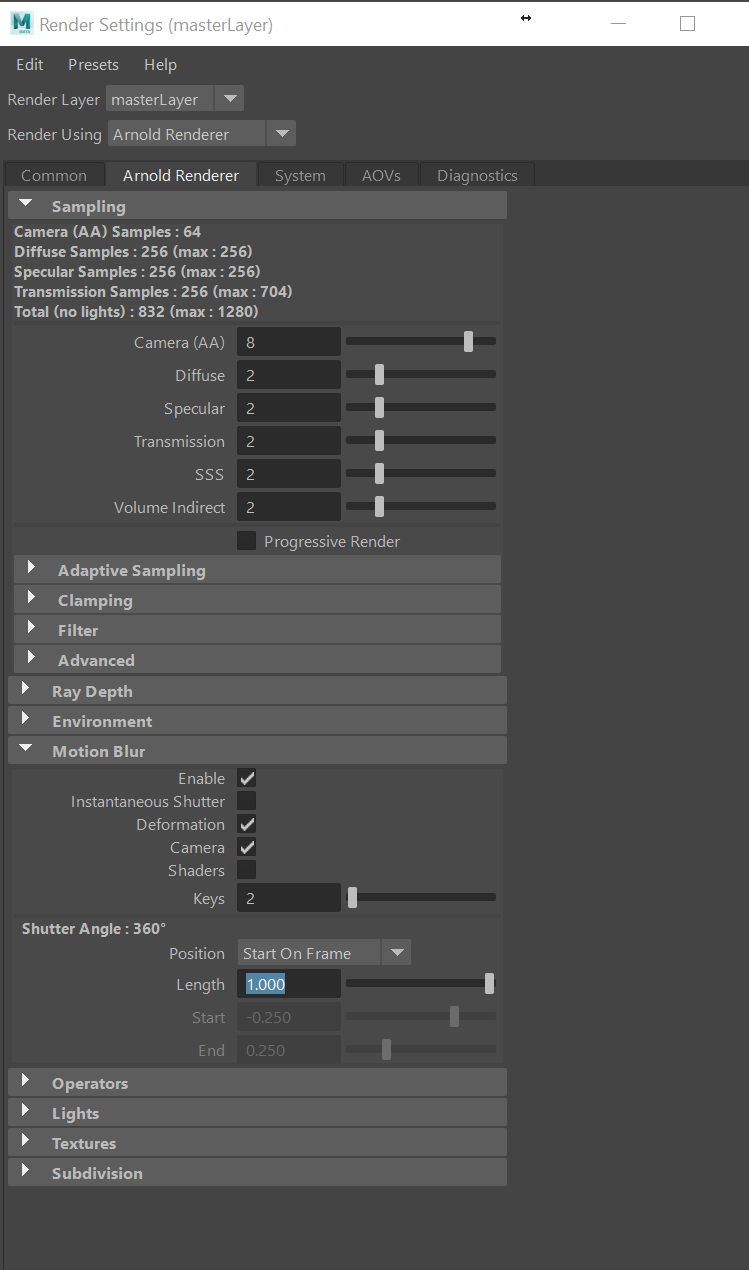
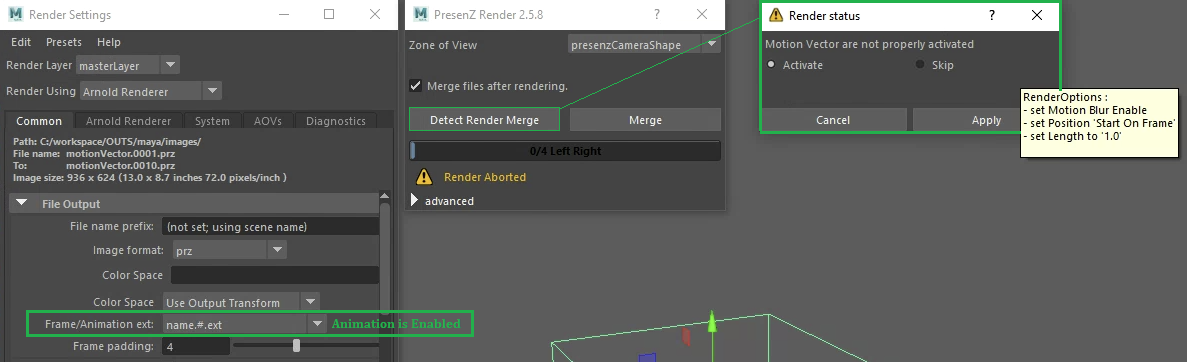
For a smooth animation PresenZ requires some Arnold settings to be correctly tuned for the motionvectors. See the General information for further details.
Note
Our Rendering Dialog will detect you are in a context of animation and will suggest you to adjust your motion blur settings automaticaly before the rendering starts.
Alternatively you can copy/paste the following lines of code in the MEL script.
setAttr "defaultArnoldRenderOptions.motion_blur_enable" 1;
setAttr "defaultArnoldRenderOptions.range_type" 0;
setAttr "defaultArnoldRenderOptions.motion_frames" 1;
You should get the same MotionBlur Settings than pictured in the frame below.