PresenZ Plug-In
When you have successfully installed V-Nova PresenZ and launch Maya, a new shelf should be added named “PresenZArnold”. If you open the shelf you will see a toolbar appear with 7 buttons.

From left to right:
The render dialog : An easy way to launch a render.
Create Zone Of View : Create a Zone Of View at the center of the scene.
The Tagging Manager : To tag a surface with the PresenZ glass attribute settings, or to tag an object as a prz_chaotic
The Window Render Shape Creation dialog Open a Dialog to create the PresenZ Window Rendering Shape from a polygon mesh.
PresenZ merger command: Opens the PresenZ Merger in a command prompt, which is located by default in
C:\Users\<username>\PresenZ\Maya<version>\MtoA<version>\utilitiesfor your version of 3dsMax and V-Ray. For more information you can visit the Utilities section of the documentation.Help: Will direct you to the V-Nova PresenZ support page.
Updater: Updates V-Nova PresenZ to the latest version.
Note
If for some reason you do not see this toolbar in Maya, see the trooble shooting section
The Render Dialog

List all the available Zone of view in your scene and allows the rendering of each individualy.
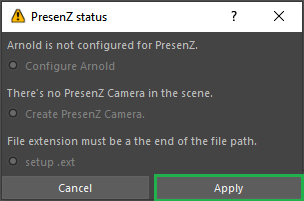
In case you did not set certain settings such as setting the render engine to Arnold, enabling bucket rendering, or creating a ZOV, The Dialog will prompt you to automatically change these settings.
Creating a Zone Of View
Use the Icon to create a Zone Of View in your scene.

Once a camera is created in your viewport, it should appear like this:
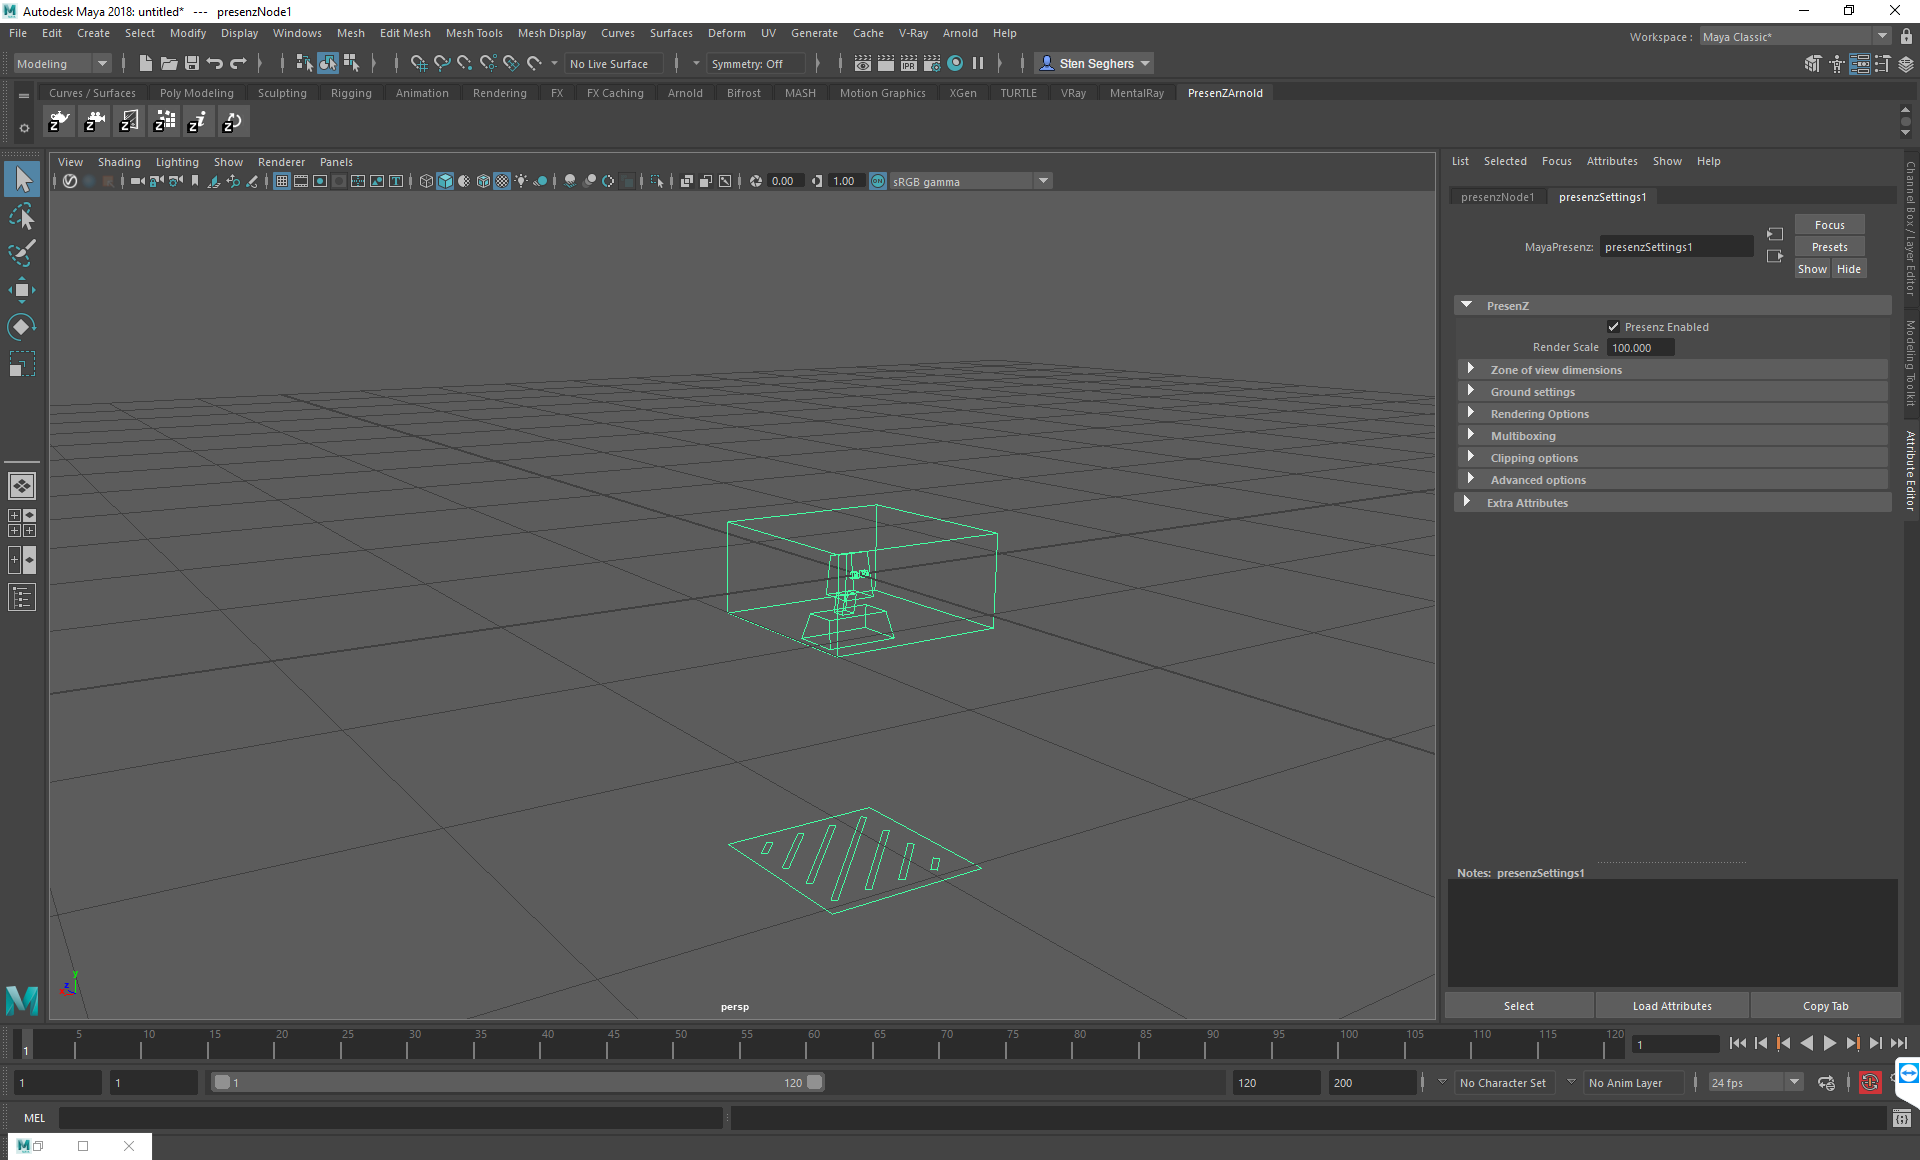
As you can see the camera is represented by a box ( the Zone Of View ), with a viewer avatar inside it. The viewer avatar represents the VR user, its orientation corresponds to the default orientation of the VR user. This UI allows you to visualize the effects of changing parameters, like the size of the zone of view, the render scale, or the viewer IPD.
Zone Of View Parameters
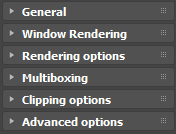
The PresenZ Camera Parameter section is divided in 6 sections.
PresenZ enabled: On by default. Uncheck this box to disable the PresenZ render.
Render Scale: Default is 1.0 . This will change the scale of the scene in VR without having to rescale all objects in the maya scene. Refer to the general section to get more information on the scene scale .
Render Isolated : Only render objects that have been tagged as Isolated with the Tagging Manager.
Zone of View Dimensions

Zone of View dimensions: By default the Zone of View is 1.0m , 1.0m , 0.5m , and the distance to the ground is 1.6m. These can be changed to increase the size of the Zone of View. For more information on the Zone of View please refer to this section .
Ground Settings

Display ground: On by default. Allows to visualize how far the center of the ZOV will be from the ground in real life for the VR user. Ideally you want it to match with the ground in the 3D scene, so that the VR user will feel like he is standing on the ground and not floating.
Rendering Options

Draft Rendering: Off by default. Enables PresenZ draft rendering mode. This feature allows you to make a quick VR test render. This is helpful to have a sense of your lighting setup , position of the Zone Of View and the general scale of your scene. Without having to do a full render. But this will not cover all the possible viewing positions inside the ZOV, you will see “undefined” or missing zones with the Draft Rendering enabled so it is not suitable for production.
Render Inside ZOV: Off by default. This enables to render objects inside the ZOV. Unless checked, objects within the ZOV won’t be rendered.
Render Isolated : Only render objects that have been tagged as Isolated with the Tagging Manager.
By default V-Nova PresenZ will render a window as a “stereoscopic poster” displaying what can be seen behind the window. This works great for far away windows or transparent objects, but for objects located close by to the ZOV it is recommended to tag them as “glass” in order for V-Nova PresenZ to render them correctly. More information on transparency and glass objects can be found here
Multiboxing
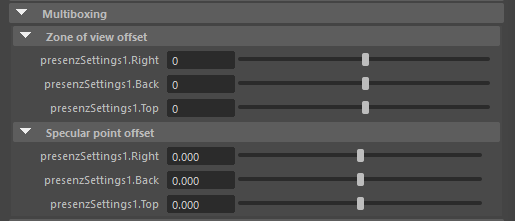
The following parameters are used for the multiboxing setup. For a more detailed explanation of this feature go to the multiboxing section.
Zone of view offset: this parameters shifts the zone of view away from the “original” central zone of view. Every zone of view needs to be rendered out separalty.
Specular point offset: Used to move the specular point (located between the eyes) from which reflections are rendered. It does not change the position of the zone of view at playback. More information on the specular point can be found here.
Clipping
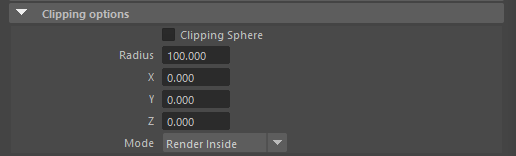
This section allows a user to create a clipping sphere, a tool used to render only a part of the scene. This is useful if you want to focus on a certain element in your scene and have a faster result to review.
Clipping Sphere: Off by default, Enables a clipping sphere.
Radius: The default value is 100.
X: The X coordinate of the sphere center in world space.
Y: The Y coordinate of the sphere center in world space.
Z: The Z coordinate of the sphere center in world space.
Render Inside: The default is render inside, only what is inside of the clipping sphere will be rendered. By setting this value to “render outside” you will render your scene excluding the part that falls within the sphere.
Advanced Options
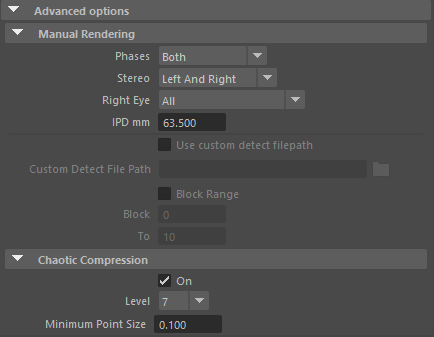
V-Nova PresenZ renders with a two phases system, consisting of the detection phase and the render phase. Normally when rendering a scene, both of these phases have to be executed for each render. However, in the case that only some changes were made to lights or texture elements, without editing the geometry of your scene, it is possible to re-use the detection phase files. Advanced users can set this option here.
Phase: By default this is set to process “both“ phases. Set it to “Detect Only“ or to “Render Only“ if you want to process only one phase.
Stereo: Applies during the rendering phase only. Rendering “Left“ only will make any reflection feel like it is baked on the surface of the reflective object. “Left and Right” renders distincts przRenders for each eyes, they will be combine later into a single prz.
Right Eye: Specify what will be added into the Right channel. “All“ means all surfaces. And “Tagged“ or “Not Tagged“ are added to the right eye depending if there’s a tag on the surface or not. See the Tagging Manager for more details
IPD: Inter-Pupillary Distance, 63.5 millimeter by default. Allows to change the distance between the eyes, this only affects the rendering of the Right Eye.
custom detect file path: For the render phase only, allows to manualy set a przDetect file that will read at the begining of the render phase.
Block Range: This will require you to have an existing przDetect file and enter it in the path above. You can select which blocks to render. How many blocks you have to render depends on every scene, and is displayed inside the render logs at the end of the Detect phase. A scene with a lot of occlusion will have more blocks. By default all blocks are rendered, but for advanced users, in case the rendering of a some block failed, this allow to re-render only those blocks. this is especially helpful if your render is interrupted at a certain block, in this case you can just pick up where you left off. Additionally you can use this to spread out the rendering of the blocks over several machines. You can see how many block are rendered in your output przRender folder or from your render logs.
Chaotic Compression: On/Off. Use the tagging manager to tag an object that is a complex geometry (Like hairs, grass, trees). When turned on this will render the tagged geometry compressed.
Chaotic Compression level: The level of compression on chaotic tagged objects by default this is set to 7. The compression Level changes the depth of each slice, higher numbers lead to bigger slices and thus higher compressions. For more information what this means refer to chaotic object section in the general information .
Minimum Point size: Size of the points in VR. By default this is set to 0.1cm and is a good standard for 3024x2018. See the underscanning section in general information .
The Tagging Manager

The tagging Manager is useful to attribute tags on surfaces.
The Glass tag is used to indicate the window glasses in the scene. Get more details about glass tagging and rendering in the general section
The Chaotic Tag can be used on complex geometries ; sush as trees, hairs or grass ; to be compressed by V-Nova PresenZ. Get details in the general section or in the ZOV parameter
The Isolated tag can be used to render only some objects from the complete scene. This tag must be use in conjonction with the render isolated parameter from the rendering options.. This tag acts like a render selected object button.
The Stereo tag is used to specify wich objects to render in the right channel for the stereo. The parameter “right eye” set to “Tagged” or to “Not Tagged” will only consider the tagged objects for the rendering. Instead of rendering the whole scene in stereo, this tag allows saving computation time.
The Window Shape creation Dialog
This dialog is usefull to define a PresenZ Window Shape ( stored in the .przWindowShapes format ) from any maya mesh for PresenZ Window rendering
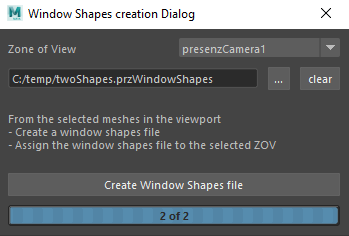
See the Window Shape creation Dialog page to get details about PresenZ window shape creation in Maya and read the General Information to be introduced to the concept.