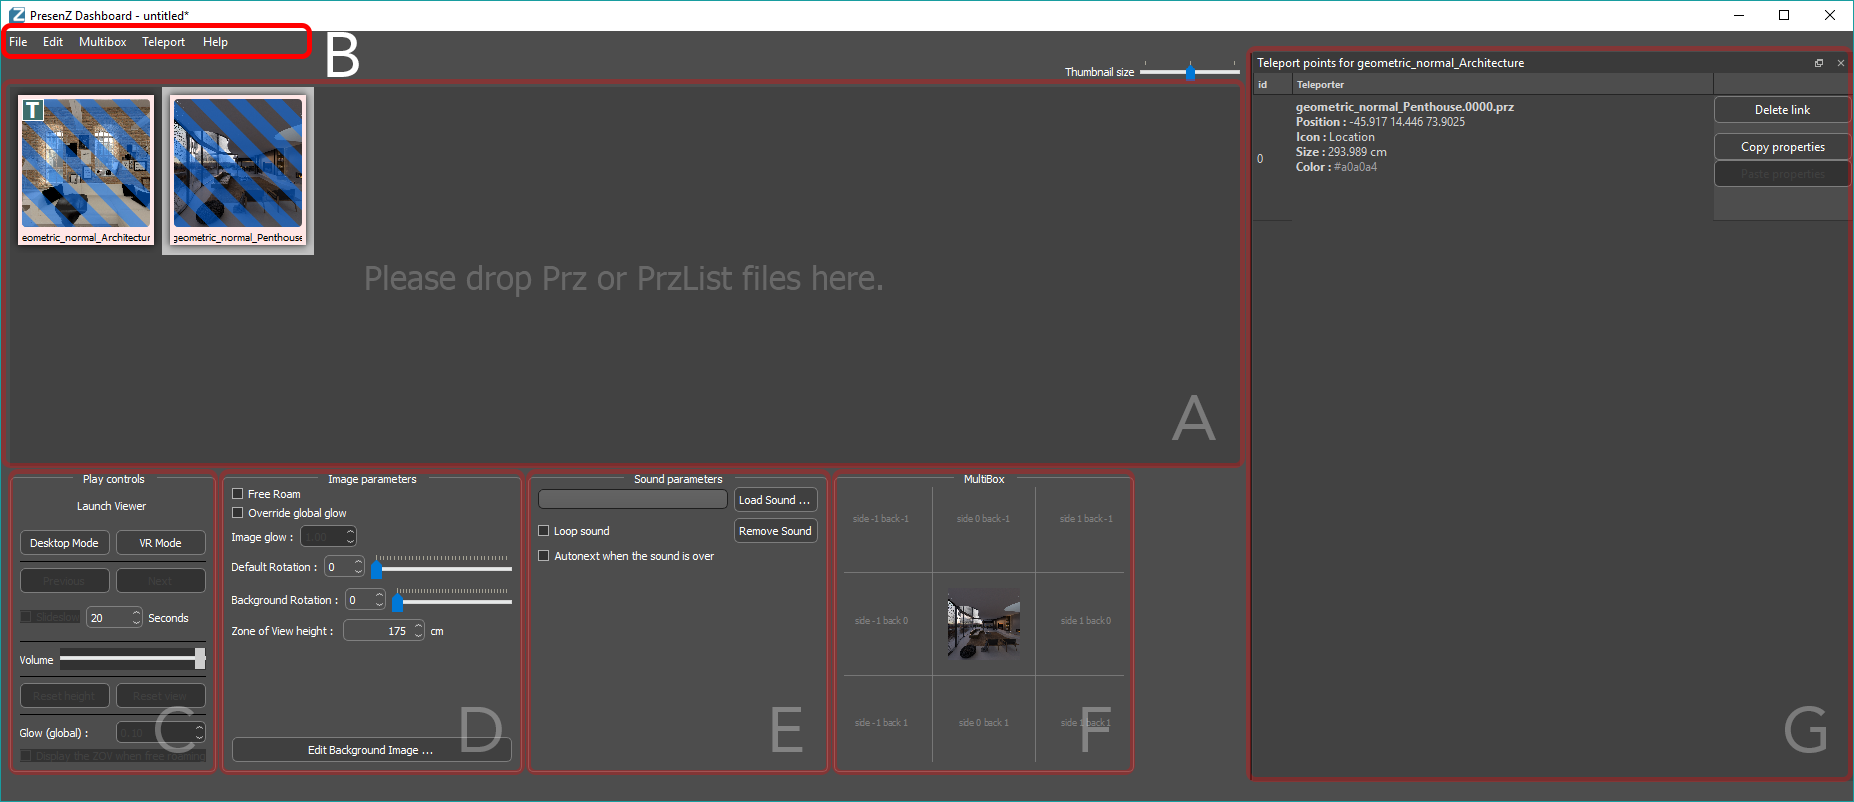
B. Menu bar.
File
File->New (Ctrl + N): Start a new .przlist project.
File->Open (Ctrl + O): Open an existing .przlist file.
File->Import (Ctrl + I): Import .PRZ or .przlist files.
File->Save (Ctrl + S): Save current project.
File->Save As: Save current project as a new .przlist file.
Note
a .przlist file points to the .PRZ images. If these .PRZ images are deleted or relocated, the .przlist file won’t be able to find them.
File->Create Package: Copy and save all the files in a single folder and generate a .przlist with relative paths.
File->Exit (Ctrl + Q): Exit the dashboard.
Edit
Edit->Undo (Ctrl + Z): Undo last action.
Edit->Redo (Ctrl + Y): Redo last action.
Edit->Create multibox from selection (Ctrl + M): When you have 2 or more .PRZ files selected, these will be merged into a multibox.
Edit->Select All (Ctrl + A): Select all files.
Edit->Delete Selected (Del): Delete all selected files.
Edit->Update Image (Ctrl+U): Will update the current .PRZ image, keeping all the current settings and teleport points.
Note
Updating an image allows for the selected .PRZ image to be replaced by another .PRZ image, but it keeps its current image settings.
Edit->Settings: Open the general preferences settings window.
Edit->Settings
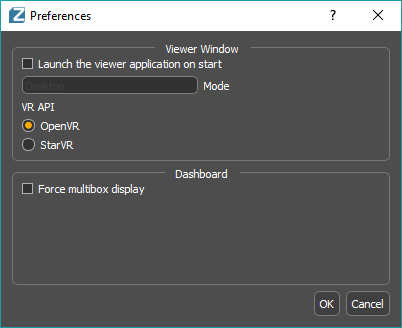
Launch viewer application on start: If checked it will launch the viewer when launching the dashboard.
Mode: If the launch viewer is checked, allows you to select whether the viewer will start in Desktop or VR mode.
VR API: Default value is OpenVR, most headsets support this mode. Only change it to StarVR if you are using a headset that supports this.
Force multibox display: If checked it will force the multibox grid to be shown in the UI otherwise it will only show if you import a .PRZ image with a multibox offset (different from 0x,0y,0z).
Multibox
Multibox->Create multibox from selection (Ctrl + M): When you have 2 or more .PRZ files selected, these will be merged into a multibox.
You can also create a multibox using the Multipox Setup Grid
Teleport
Teleport->Edit teleport points (Ctrl + T): Will allow you to edit the teleport points of the selected image. Displayed by a T on the thumbnail.
Teleport->Copy teleport points (Ctrl + Shift + C): Will copy the teleport points of the current image you are editing.
Teleport->Paste teleport points (Ctrl + Shift + V): Will paste the teleport points of the current image you are editing.
For additional information on how to - create and edit teleport points in your .PRZ images, please refer to the Edit teleport points window
Help
Help->Dashboard help: Will open a browser with the documentation on the PresenZ dashboard.
Help->License request information: Will display the UUID of the computer in which the dashboard is installed. We will need this information to generate a license.
Help->Check for update… : Will check for the latest dashboard/viewer version and update if found.