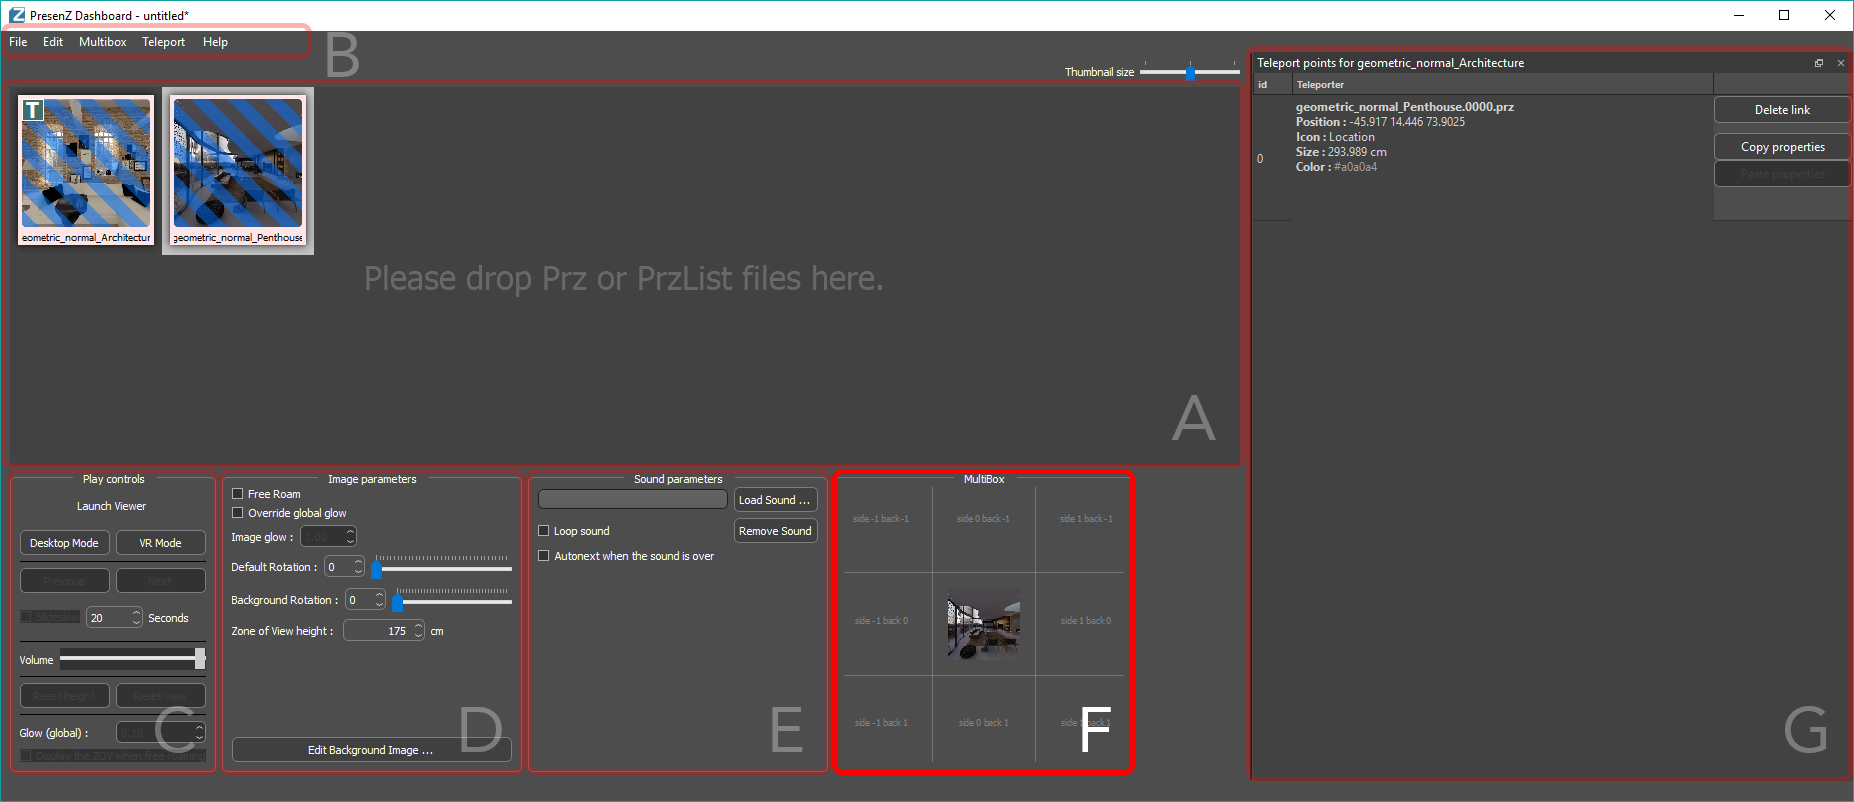
F. Multibox setup grid.
This section explains how to assemble several .PRZ images to create a multibox, for an explanation of multiboxing you can refer to the multibox chapter.
The multibox setup grid will only be visible if you have a .PRZ image selected where the zone of view is not in position x0,y0,z0. You can force the multibox setup grid to be visible at all times in the Edit>Settings menu.
For this demonstration it is assumed that you have gone through the process off rendering out multiple zones of view with different x,y,z positions, and you now wish to assemble them.
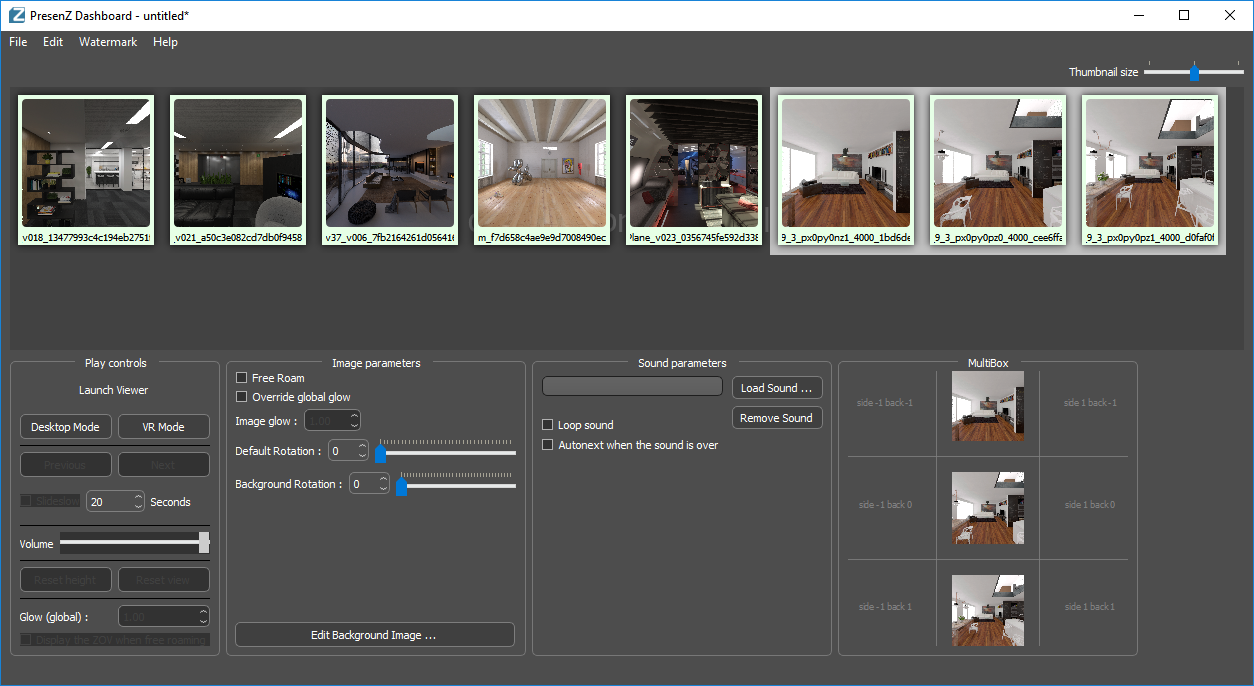
In the screenshot above you can see that 3 different .PRZ images are selected. Each of which have a different location inside the Multibox setup grid visualisation.
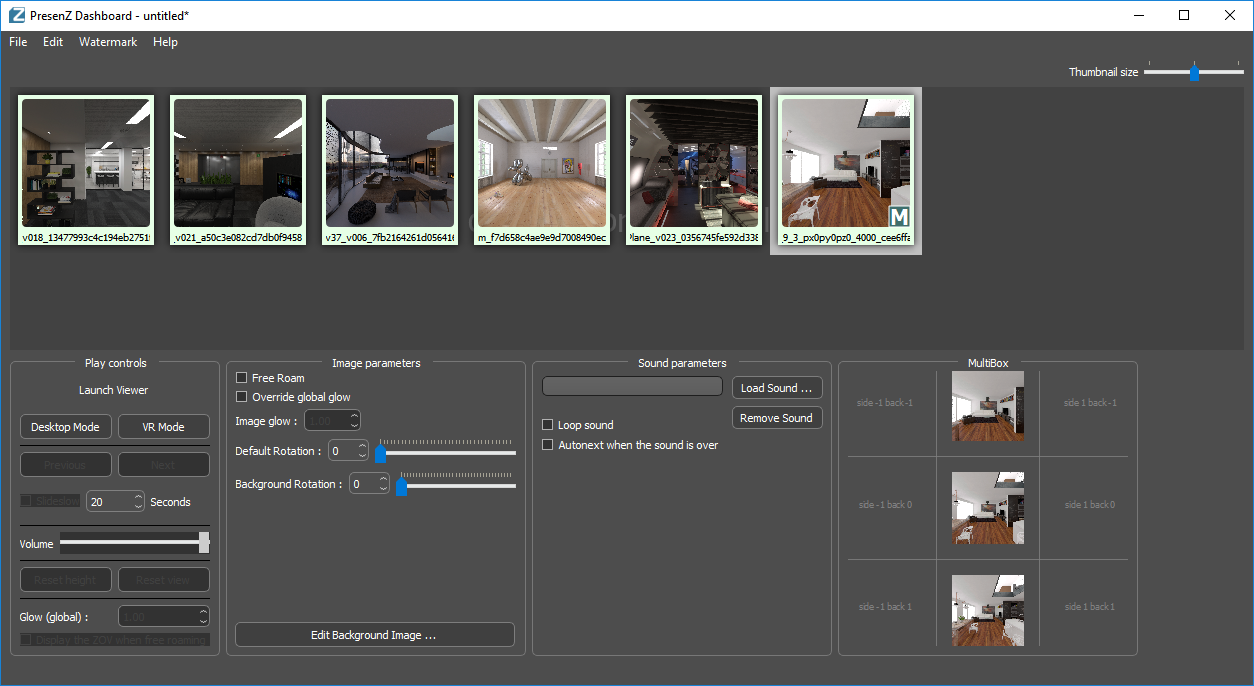
To assemble the selected .PRZ images together, go to Edit -> Create Multibox From Selection (or press Ctrl + M).
Once the assembling is done you will see only one .PRZ image in the workspace with an “M” icon for Multibox, but you will still see all of them in the multibox setup grid, as illustrated in the screenshot below.
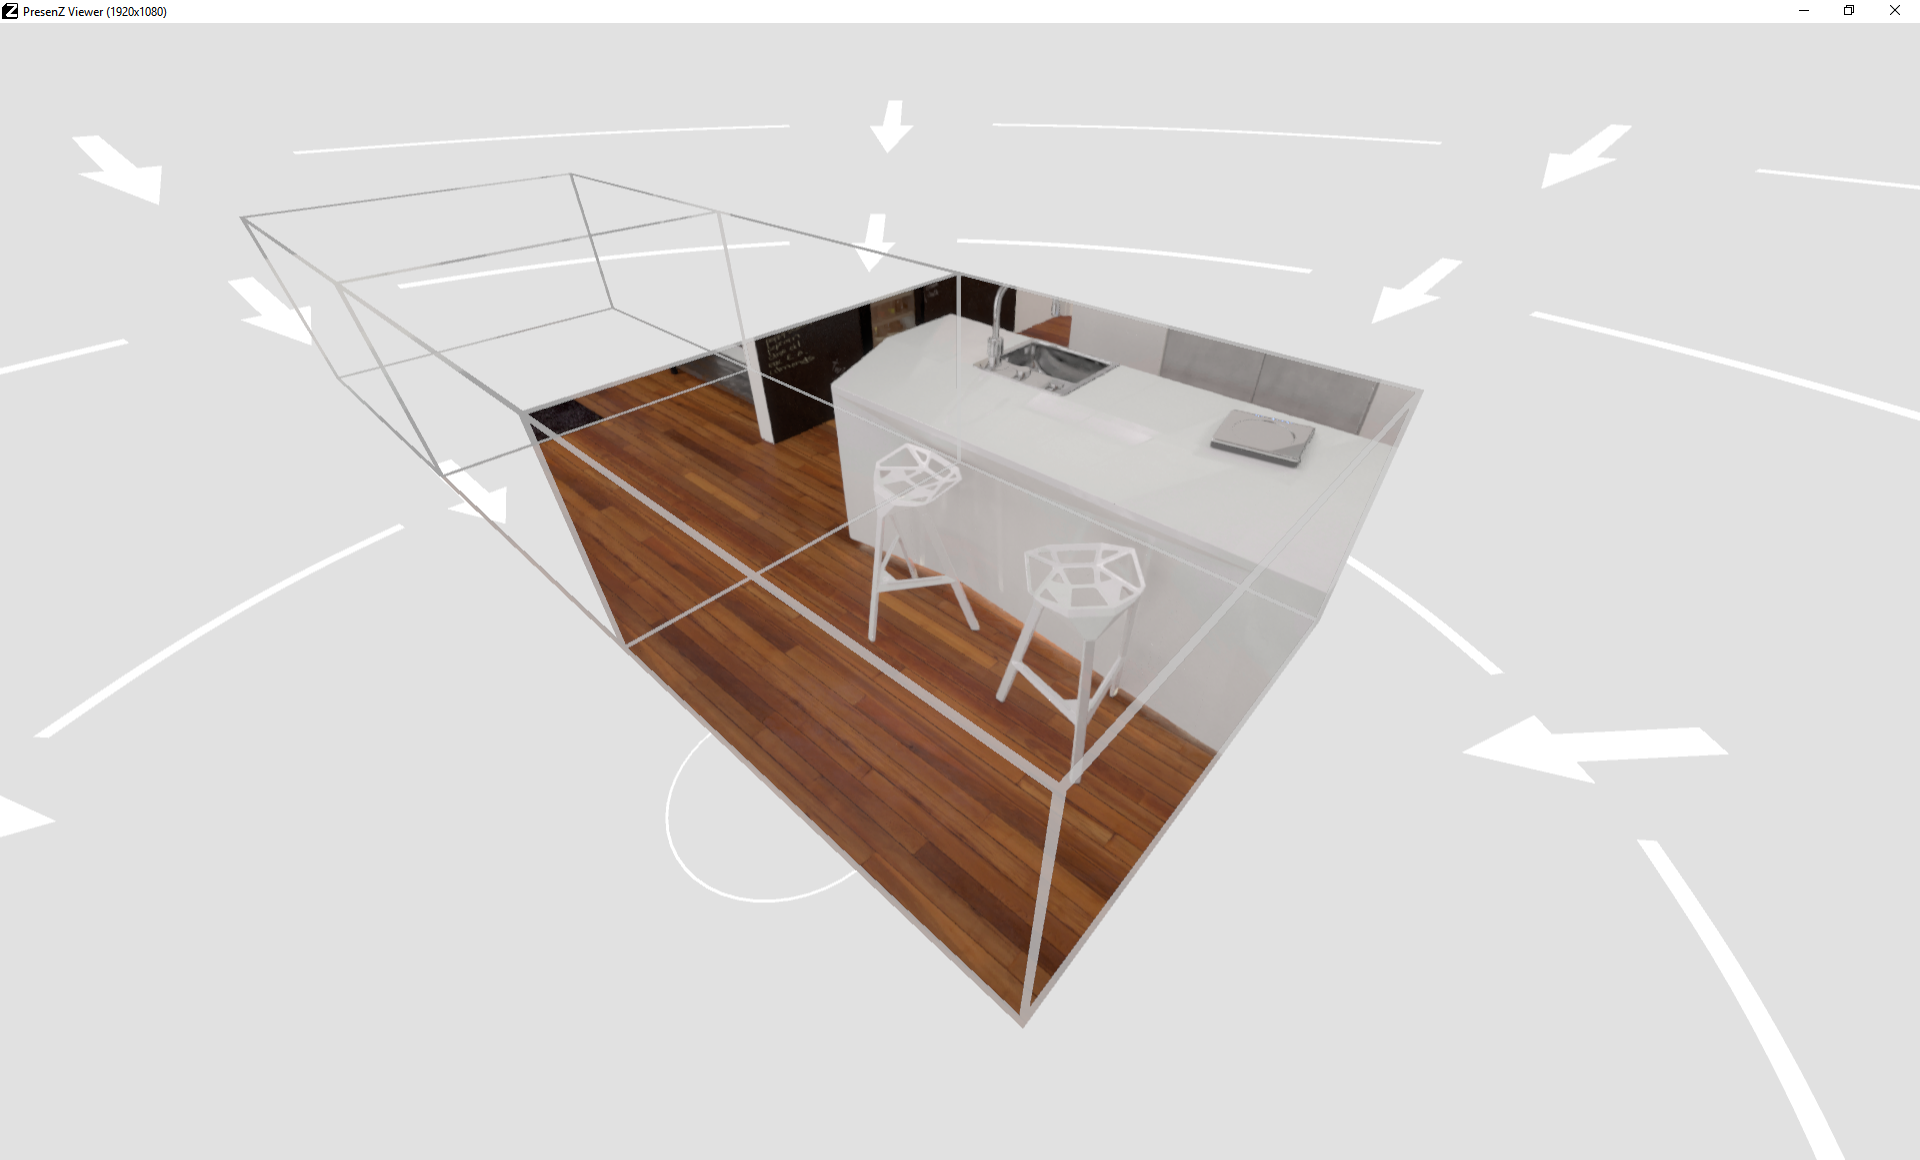
The screenshot below shows the example multibox assembly in the viewer when seen from the outside.
To remove a .PRZ image from a multibox assembly, you can simply drag and drop the desired .PRZ image from the multibox setup grid back to the workspace.