V-Ray Specifics
V-Ray 4.x Frame Buffer Color Corrections (VBF1)
V-Nova PresenZ merges your przRender files and automaticaly applies the color corrections from the VFB1. During the merging phase, V-Nova PresenZ exports the color corrections settings from your VFB into a ‘.vccglb’ which will be read by the merger. This file is typically exported in the przRender folder of your PRZ file.
If you are done with your PresenZ rendering but not fully satisfy with your ColorCorrection, you can tweak them as usual and make your PRZ file again using the “merge” button. Your PRZ file will be overwritten with the new color corrections.
Alternatively, if you are merging manually through teh command line, and you wish to assign the vfbcc file yourself, you can do so by using the presenz_merger.exe file. More information here.
V-Ray 5.x Frame Buffer Color Corrections (VBF2)
Warning
Since V-Ray 5.0, V-Nova PresenZ is unfortunately not compatible with the new vrayFrameBuffer Color Corrections yet. We are trying to solve this issue.
Alternatively, if you are merging manually through teh command line, and you wish to assign the vfbcc file yourself, you can do so by using the presenz_merger.exe file. More information here.
Invisible Lights in V-Ray
In previous versions of V-Nova PresenZ, invisible lights in V-Ray would sometimes cause holes during the detection phase. The problem with invisible lights in V-Ray, was that though they were indeed not visible in the render phase, they were still intersecting our probe rays during the detection phase of V-Nova PresenZ. This was a problem caused by the V-Ray render engine through its implementation of “invisible objects”; they aren’t truly invisible, just not detectable to render rays.
This issue has been resolved in version 2.0.0 of V-Nova PresenZ.
V-Nova PresenZ still allows you to set all light to invisible/visible as an optimization feature. When setting your lights to invisible, it will still cast light onto the scene, its only the geometry of the light that will be omitted in the render. If your scene contains a lot of lights, setting them all to either invisible/visible allows V-Nova PresenZ to not have to check the visibility of each light individually, thus speeding up the rendering process.
Glass Tagging
Get general information about transparency rendering with PresenZ.
Apply the glass tag to the selected geometries with the tagging manager.
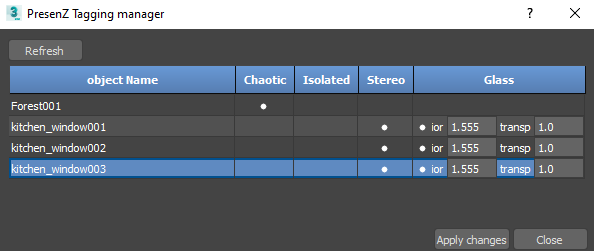
Transparency: By default this will be set to 1,0 . This controls how transparent your mesh has to be. For a perfectly see through window 1,0 is recommended.
IOR: By default this is 1,6. Idealy, this should match your IOR settings from the material shader you used for the surface.
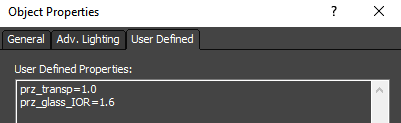
By clicking “ set glass attributes “ the following lines will be added to your selected mesh’s object properties. This is finally what V-Nova PresenZ needs to recognize a Tag.
Warning
The transparent material must be applied on the whole object’s mesh, and not on some faces only. Just like the prz_glass_IOR flag which is only effective on the whole object. The V-Ray Multi/Sub material, assigns materials by ID and thus can’t be used for a transparent material in V-Nova PresenZ.
PresenZ Glass Material
If you want to apply more complex changes to your glass objects you can work directly with this glass material in the material editor without using the tagging manager.
Create a VRayPluginNodeMtl and select the BRDFPRZGlass plugin, here you can edit the glass material to your specifications.
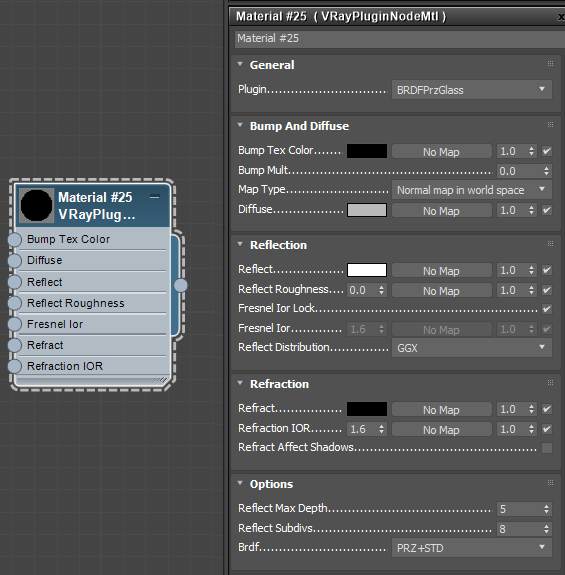
You will be able to link textures to the different channels, like diffuse map or so on.
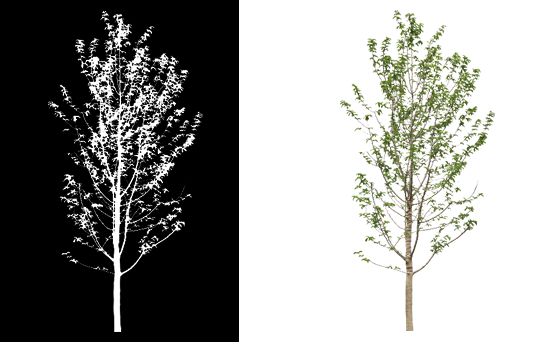
One example of an application of the glass material is stenciling.
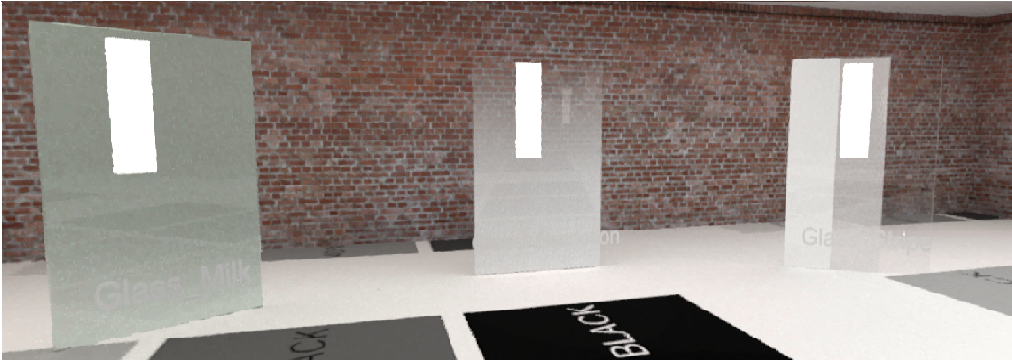
Stenciling by opacity
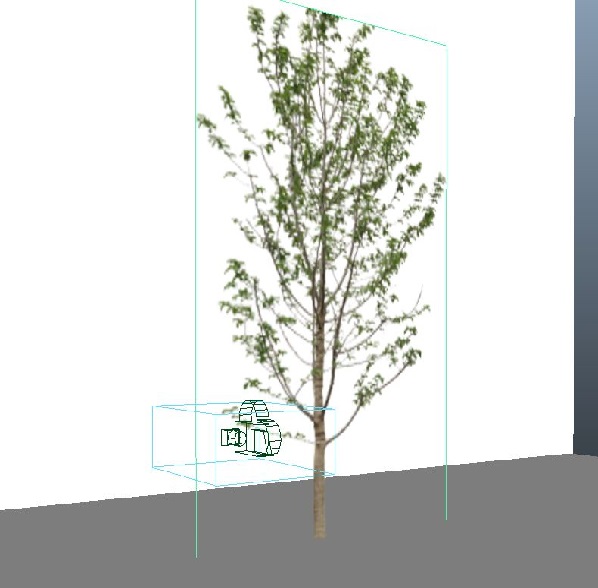
The stencil is a method to cut a surface with an 8-Bit alpha map. For instance in V-Ray this consists of assigning a map in the opacity slot of the mtl_shader. Applied on a flat object, the shader will only be computed where there is opacity through the white on the alpha channel, but this will cause complications with V-Nova PresenZ.
|
|
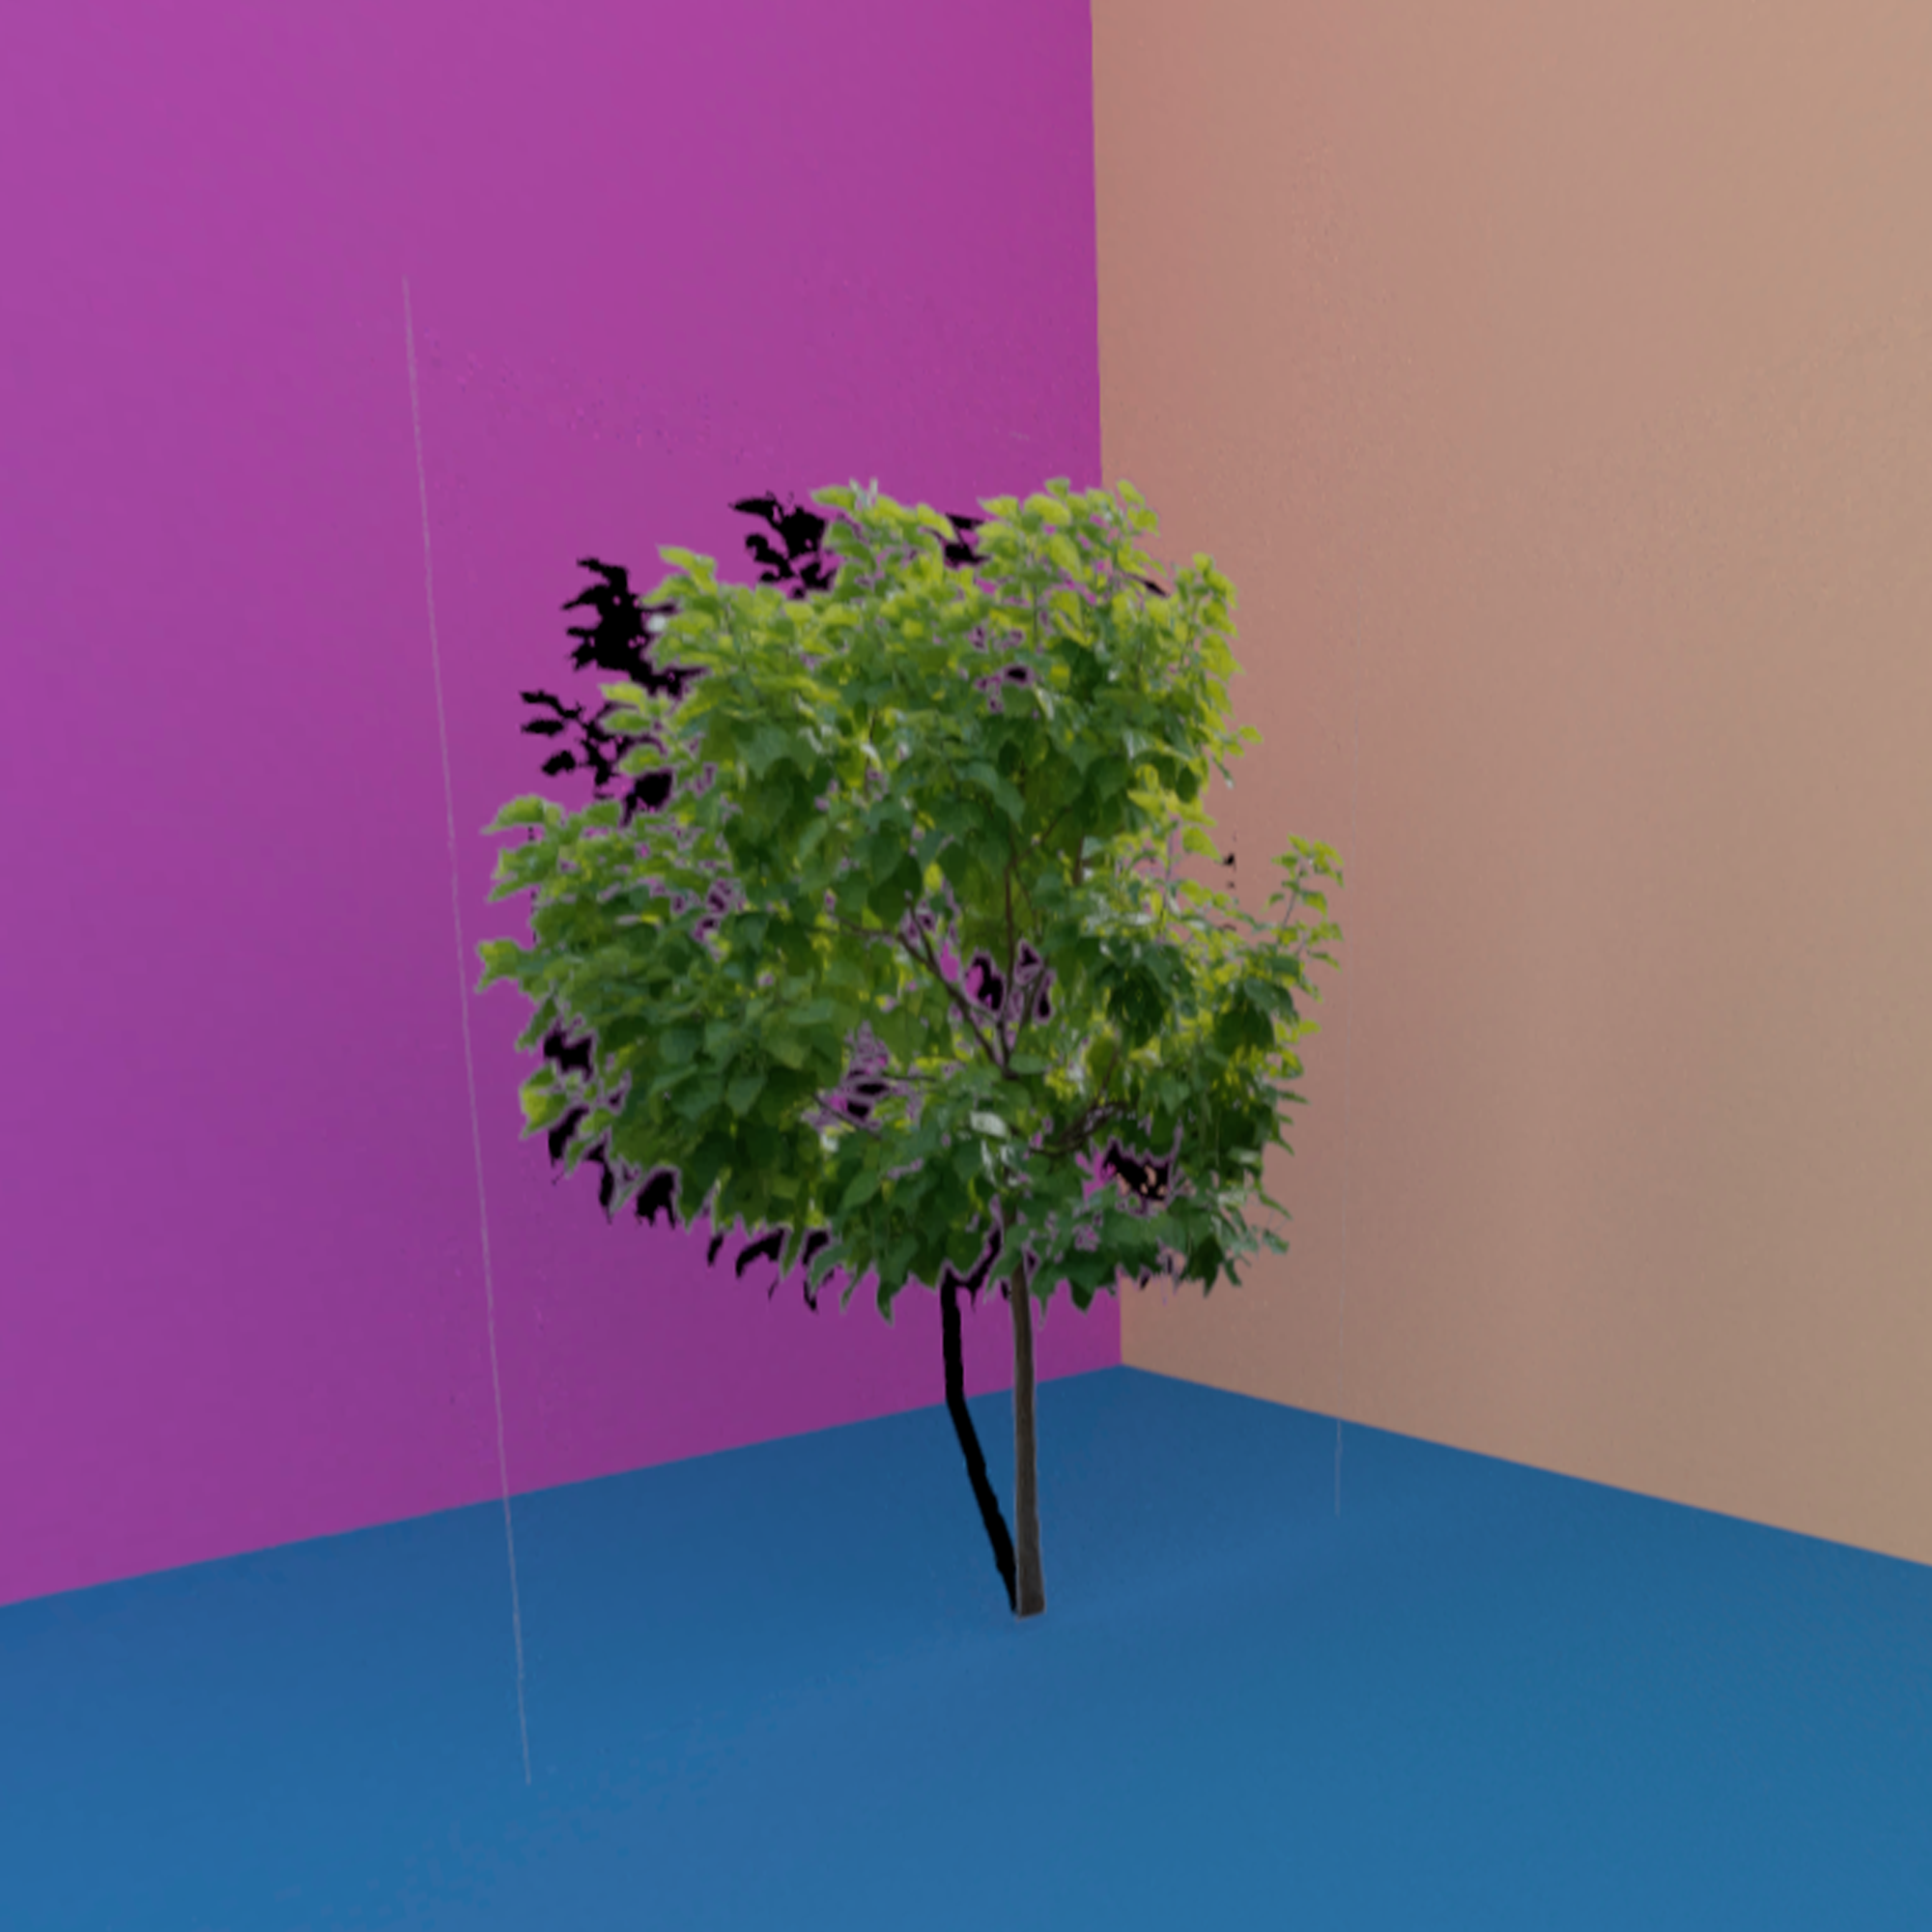
The stencil applied. It will be rendered correctly by V-Ray, but will lead to complications with V-Nova PresenZ |
|
|
|
Stenciling as usual without the PresenZ glassMaterial, brings artifatcs |
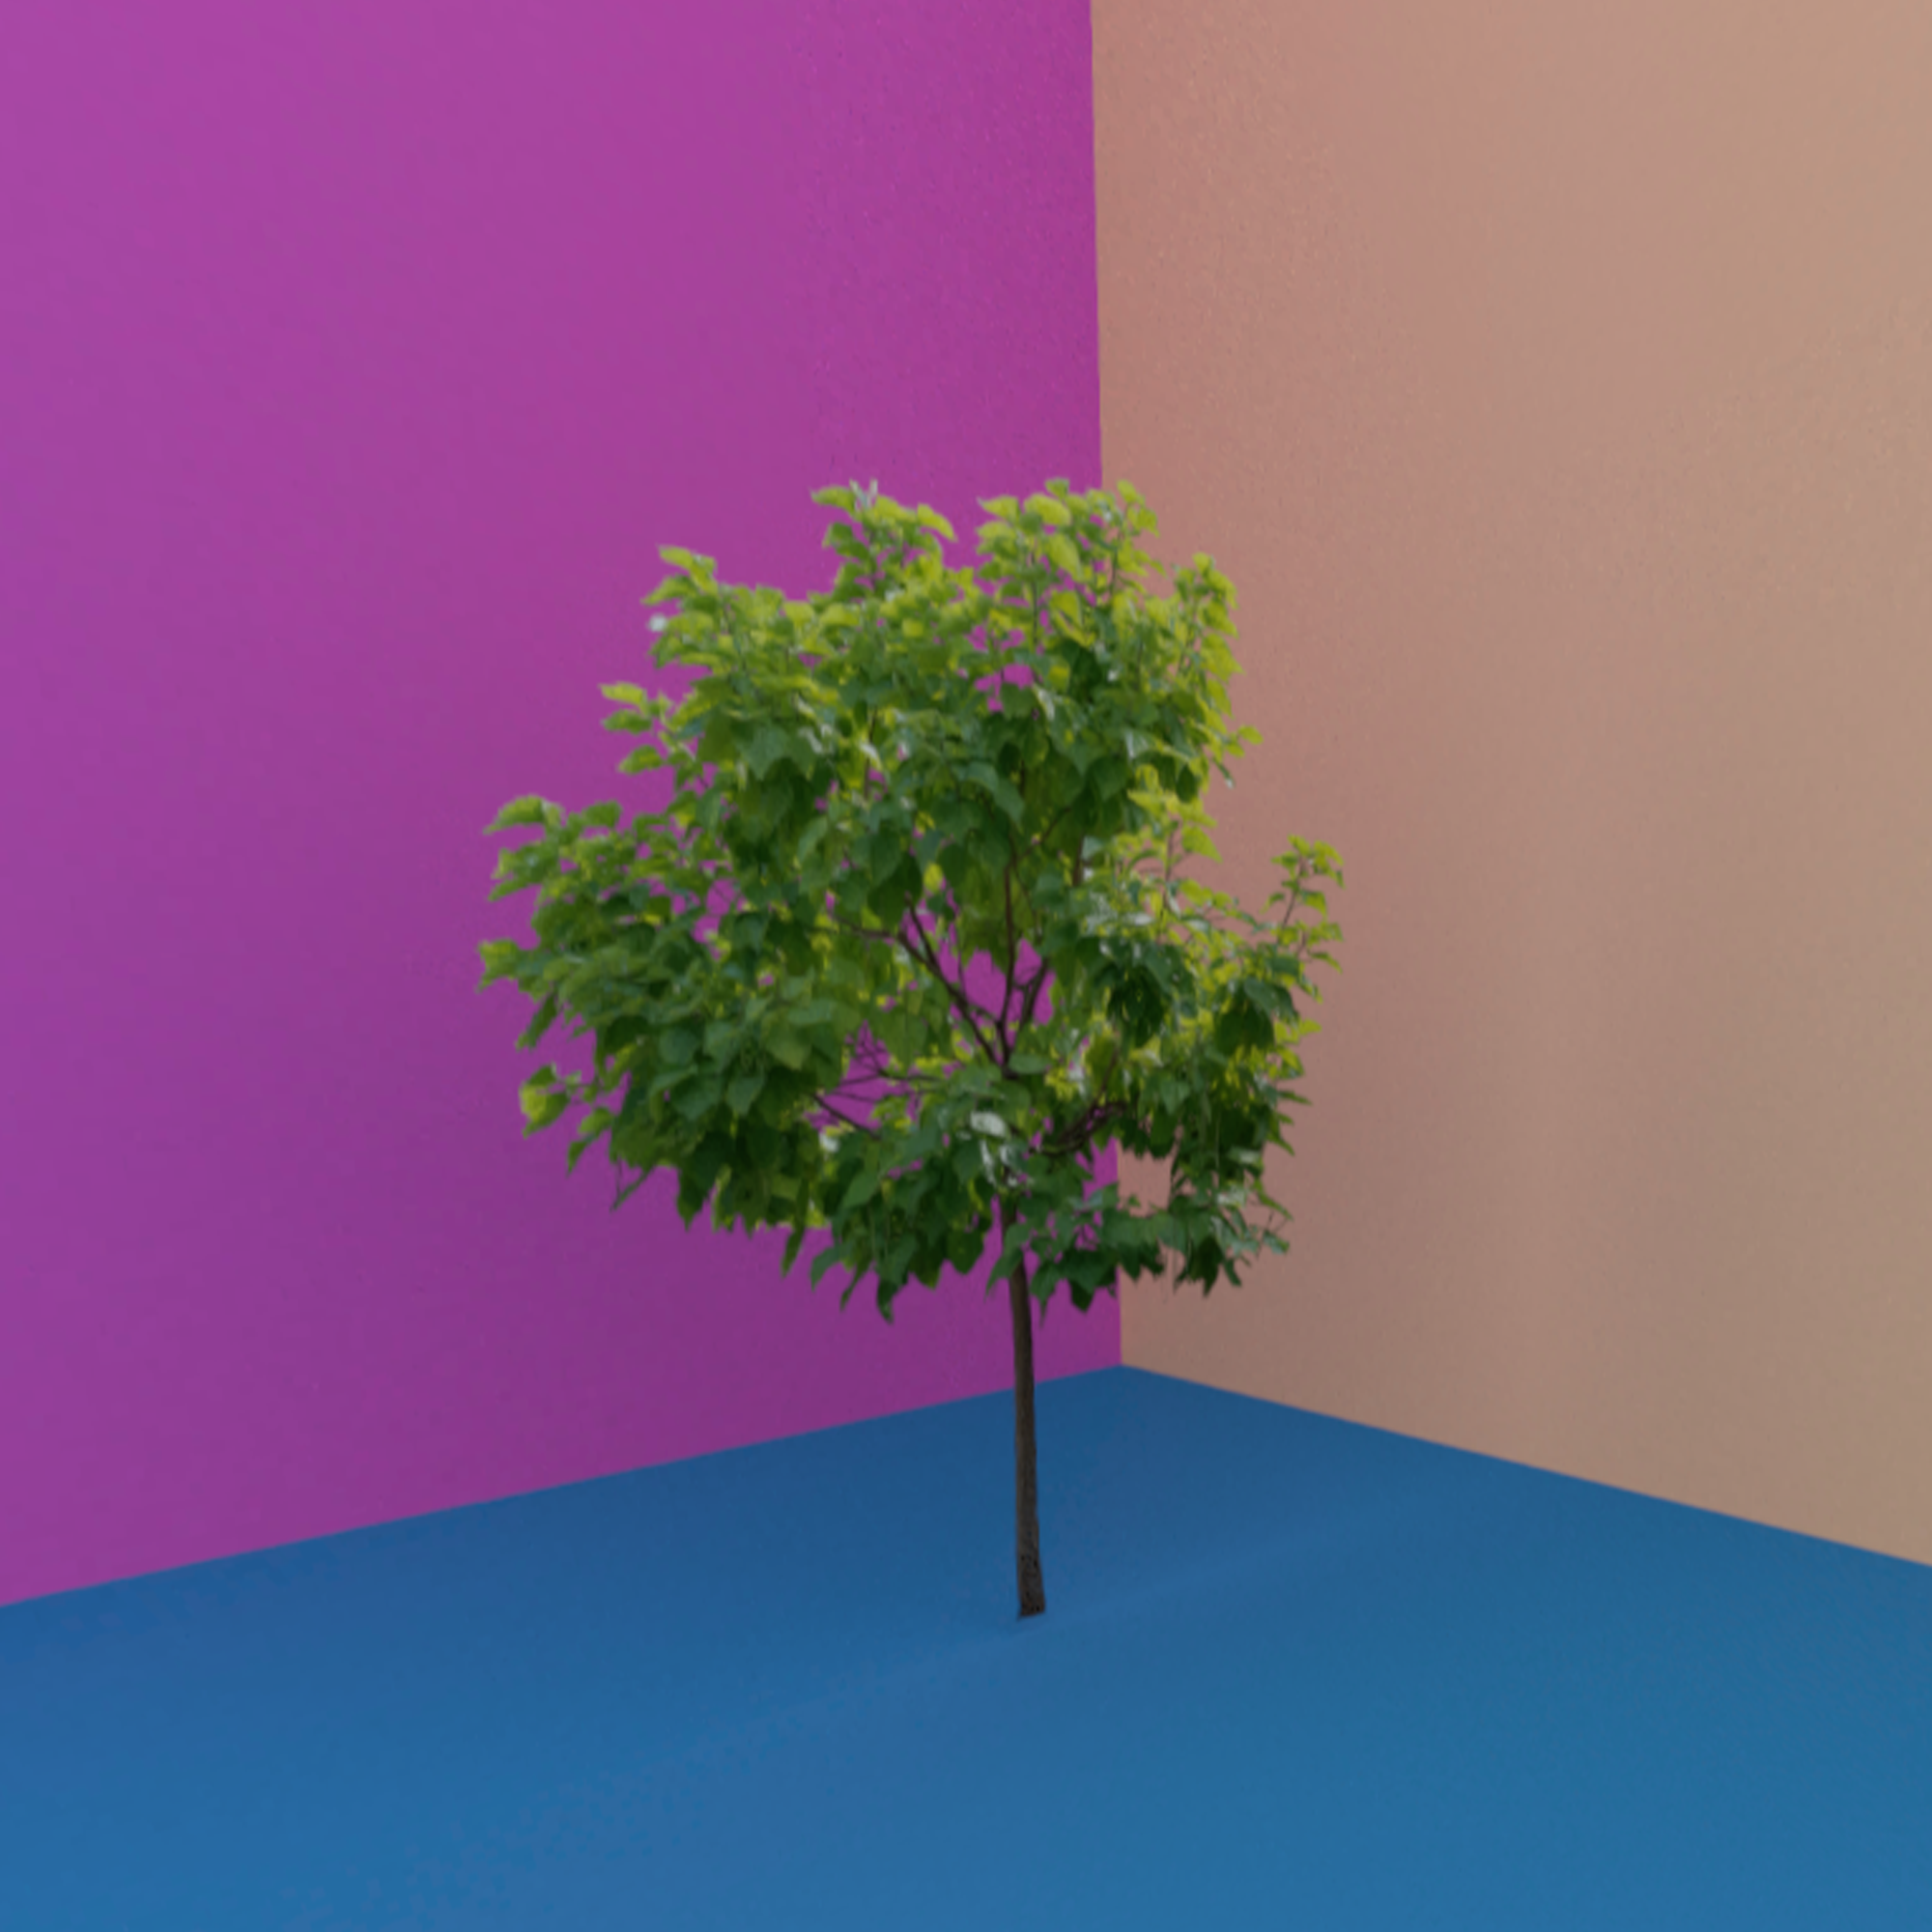
Using the PresenZ glass material to perform stencils |
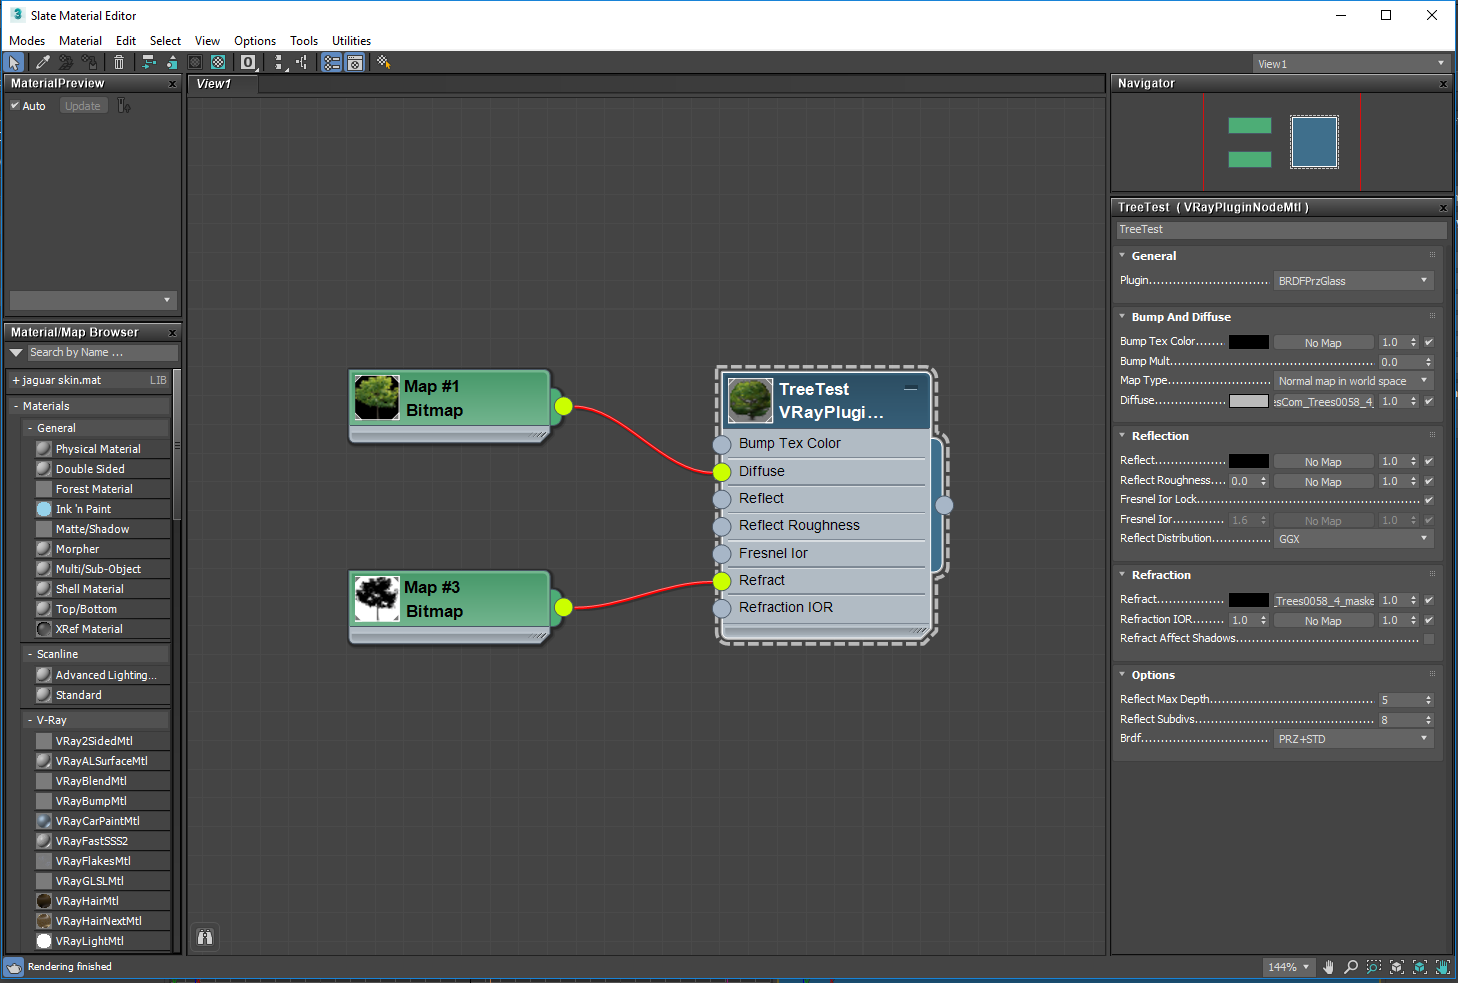
This is the typical artifact of a stencil in PresenZ. This is the typical artifact of a stencil in V-Nova PresenZ. The wall behind the tree can not be reached by camera rays, because the opacity map is not considered by V-Nova PresenZ for the spatialization. The strange artifact caused by the tree stencil can be avoided by making use of the PresenZ glass material.
The following example is given for 3ds Max and shows how to resolve this issue. In the material editor create a VRayPluginNodeMtl and select the BRDFPrzGlass plugin. Set your color bitmap as the diffuse color, and your alpha map as the refract value. Within the glass material in the refractions section set the IOR value to 1.0 and in the Reflection section set the reflection color to black. If you then assign this material to an object and you render with both opaques and transparencies enabled your stencils will render properly. Below we give an example of how this setup would look in the Material Editor.